Wow, I hardly know where to start. Fibroids-still there. Bleeding- still redonkulus. Ah, life goes on. But oh, the changes! Lets see to catch you up, I was very happy to be teaching in a challenging middle school at last writing. I was hired on a probationary certificate with all tests passed I just needed my 180 days of classroom time to get my full certificate. The school district promptly lost my paperwork which delayed my start date by 5 weeks even though I was teaching at full capacity during that time. No problem I thought, that 5 weeks can get carried over to the next school year with no problem. Except there was a problem. I got released from my campus ostensibly because of state budget cuts, last in first out as the principal said but several new teachers that were hired after me were not released. I was in shock. I had already signed a contract for the next year so I thought I was good. I had to go apply for a new job with all 800 of the other laid off teachers, most of whom had much more tenure than I did. Needless to say I did not find anything seeing as how I only had .75 of a year's experience and a probationary certificate. I was offered a substitute Spanish position at the same school I was let go from, talk about weird, at my regular rate until the district decided to terminate our contracts or place us left overs in positions. I was doing lead teacher work in a subject outside my range, lesson plans, content, assessments just like a lead teacher but I got NO CREDIT for being the lead teacher so I could not fulfill my certificate requirements and my probationary cert lapsed. I was going to have to re=test and retake the classes with my alternative certification program at a cost of 5000, which i did not have, if I wanted to keep trying to get certified. I was supremely frustrated by this time and the job was taking a toll on my health. By about the 10th week of school the kids were figuring out that I was not a "real" Spanish teacher and I was starting to have management problems. I had no books, no real curriculum and no guidance. I went above and beyond providing engaging content fro those kids well beyond the place holder position as sub I was in. Yet I was evaluated just like a lead teacher and the like. My blood pressure went up to 171/100 one night and I had to take a weeks leave of absence to get it down. I knew the writing was on the wall. As long as I worked hard providing content the school was never going to hire a real lead teacher and I was never going to get credit for the work I was doing. The school board voted to buy out those of us who were laid off if we would resign in November of 2011. I took the buyout. I was in a no win situation. So I looked for work. The district was not hiring subs without certifications anymore because they had just laid off 800 certified teachers and the pool was =flooded so there was no teaching jobs to be had. My resume is spotty so finding work became a real challenge. I have no technology education formally, I was out of the work force for almost 10 years, I'm 50. Strike one, two , and three.I applied at anything but no bites. In late june 2012,I was trolling Craigslist for jobs and what did I see? Capriotti's, only my favorite sub shop ever, was coming to Dallas and was hiring. Great news, I jumped to apply. Bad news, the starting pay was 7.50/hour. But a job is a job and that is where I have been ever since. I am appreciated at this job, I was called the best cashier in the company by 2 supervisors. I work hard, do what I need to do and do it well. I was even asked to manage a store but in all honesty I do not want to be a manager of high school kid, and those who's life's path puts me in tangental contact with felons etc. I swore I was not going to work in food service again anyway. But here I am. This job is not my be all and end all situation anyway. I am training to do voice overs at last. We took the last of our money and put it into training classes and a demo tape so I can persue this dream.
This sounds great. But it has been hard hard hard because I don't get 40 hours at work, I get about 26 per week which is not enough for us to get by on. Each month there is more month than money by the 20th. This has been hard on the entire family. Then in January on the 20th, my Dad died. We spent a wonderful Christmas with him which eased the pain of his death for me but it was still disruptive. Then, my daughter attempted suicide. It seems things had been building for a while and she was not communicating with us just how bad she felt and she was not sharing with her therapist this information as well. We got her hospitalized for a week, then got her on meds and in intensive therapy weekly. A month later she was back in the hospital for suicidal ideation again, this time ad a different facility again for a week. Then last Thursday she began to hallucinate and hear voices telling her to harm me and herself. Back into yet another hospital she went and has been there ever since. We have to make a decision about residential treatment or day treatment with what I find to be very insufficient information from the attending MD on her case. I'm irritated by the process and I think I don't like the center they have picked for her. Kevin has been traveling during this entire situation so much of this has fallen to me alone. I'm overwhelmed.


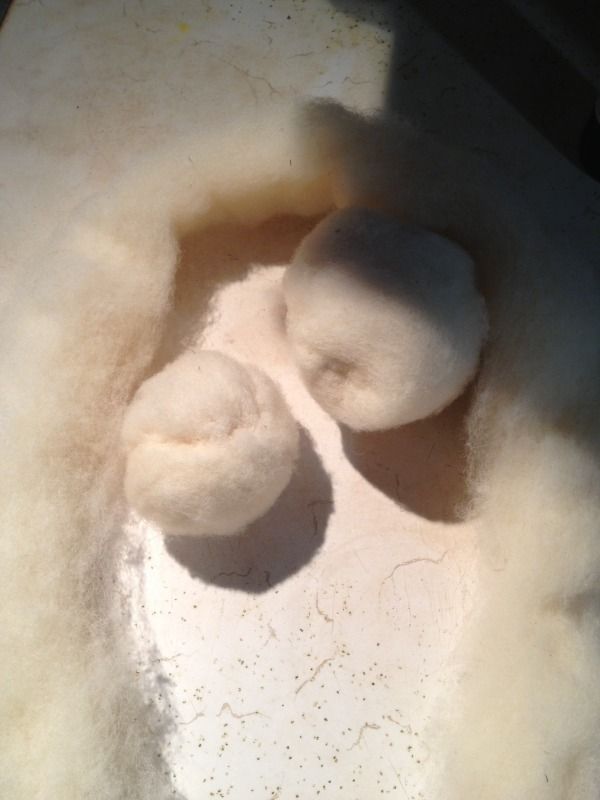
 My new dryer balls!
I think that I'm going to try an acrylic core with a roving overlay next. I can't see why that won't work. I guess I'll find out! Stay tuned!
My new dryer balls!
I think that I'm going to try an acrylic core with a roving overlay next. I can't see why that won't work. I guess I'll find out! Stay tuned!
 Then I took a needle and felted the ends so the ball would not come apart.
 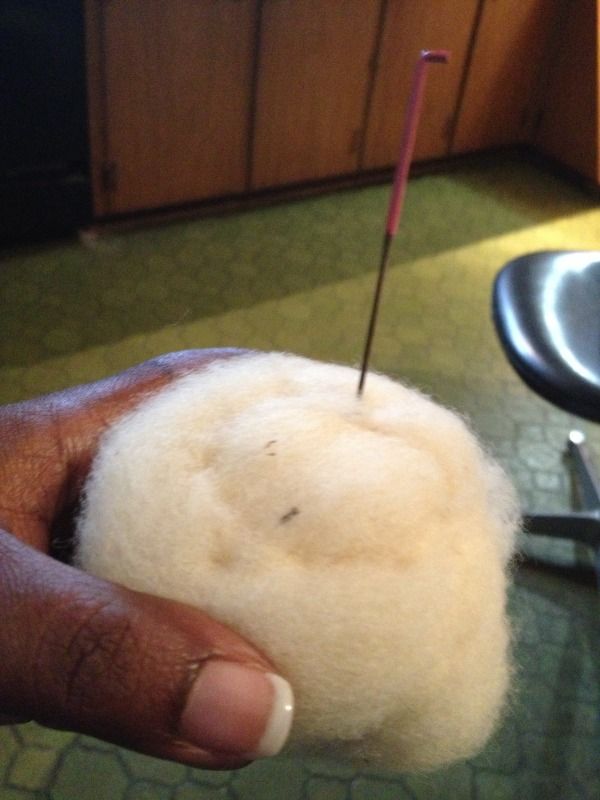 Next I felted colored roving over the entire ball
 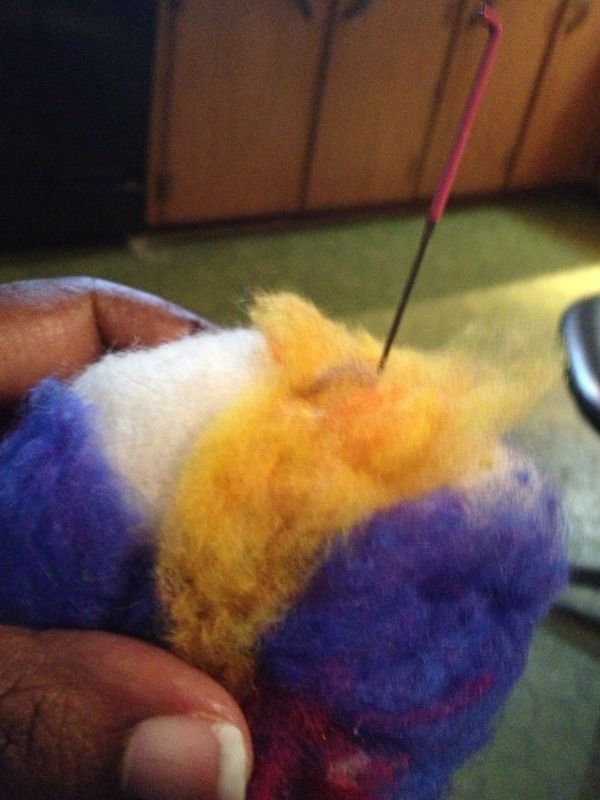 Then I put tjem in panty hose separated by a bt of cotton string.
 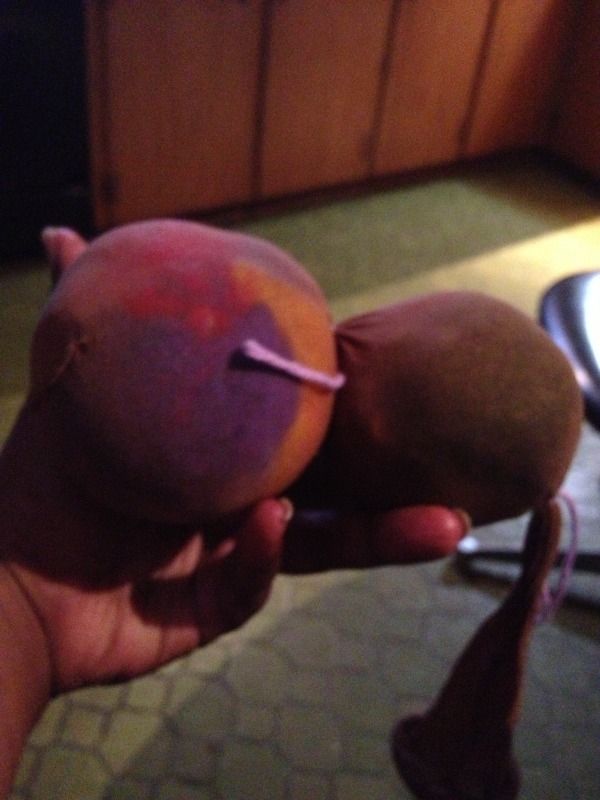 I tossed the bundle in the washing machine set on HOT and we will see what we get in about 2 hours!